NuclearQuads
Hardware Setup
Required Parts
Along with the kit, you should also have the following ready to use:
- Raspberry Pi (Version 3 or Zero 2 minimum)
- 8+GB Micro SD card for the Pi (instructions for installing the OS below)
- 1-8 RX5808s
Case Printing
Get the case file here
Check your NuclearHazard PCB version, which should be printed on the PCB. The case for version 3 is slightly different than 4+. The link above takes you to the onshape project where the case is always up to date. Find the case version number with your PCB version. Version 3 also has an option for a 40mm or 50mm fan. To download, navigate to the correct version number folder on the bottom bar, then right click the “NuclearHazard vX” tab. Click Export. Check “Export unique parts as individual files”. Click Export.
When importing the lid into your slicer, it should be turned upside down to avoid needing supports.
Print with support only on the completely horizontal overhangs. The PrusaSlicer setting for this is “Overhang threshold”. Set it to 1. Using a “Top/bottom contact Z distance” of twice your layer height (0.4mm for 0.2mm layer height) will make the supports easy to remove.
Pi/Case Installation
- If you ordered with a case, all you need to do is install your Pi by aligning the pins with the connector on the board and press it firmly all the way down.
- If you chose to print your own case, install the board by inserting the XT60 connector into its slot then lower the whole PCB in. Slide it around until the bottom of the PCB is under the small clip built into the case and the screw holes line up. Use two of the short screws in the top screw holes. Use a short screw and firmly push the screw into the hole as you screw it in. Don’t over-tighten the screws. Once they hold the PCB from moving around, they’re tight enough. Insert the Pi as described above. Use 4 long screws to secure the fan to the lid, exhausting through the lid. Plug the fan into the main PCB, then use 4 short screws to secure the lid to the case.
Note: the battery slot is not currently used by the software.
RX Installation
Since I no longer sell RXs with the NuclearHazard kits, you’ll have to order and solder your own. The following sellers have been reliable for me and haven’t needed the SPI mod.
Start by tinning one pad of the RX carrier with solder. Be very careful to not get any solder on the connector pads! Align all the pads of the RX and reheat the tinned pad to reflow the solder. Keep holding the RX aligned until the solder is hardened. That’ll hold it still while you solder the rest of the pads.
Some of the RX carrier cards included with Version 3 and 4 need to be inserted backwards. They can be identified by the bigger alignment dot, or if the RXs aren’t changing channels. This has since been fixed and the carrier cards included with Version 5+ can be aligned normally.
If the RXs are not recognized by RotorHazard, wiggle the carrier cards and repower the timer.
Software Setup
Start with a modern, fresh Raspberry Pi OS installation. Raspberry Pi OS installation instructions here. Make sure to use NuclearHazard as the username for easy setup later.
Use these commands
Run each block and check for errors as you go.
This setup will do the following:
-
Install prerequisites
-
Install RotorHazard server
-
Set up the Pi to act as a wifi access point when not in range of the network you entered in the OS setup (good for practice, but maybe not for events)
The default passwords are on the Quick Reference page.
Updating RotorHazard
If you used my script to set up the Pi, update by powering on in range of the wifi you originally set up in the Pi Imager. Then you’ll need to find the IP of the Pi (the “iNet” iOS app is what I use). SSH to that IP (use the password in the Quick Reference) and use the updating instructions in the RotorHazard docs.
Instructions to change the home wifi settings are also in the Quick Reference.
POE
Watch the video here.
Suggested POE Splitter:
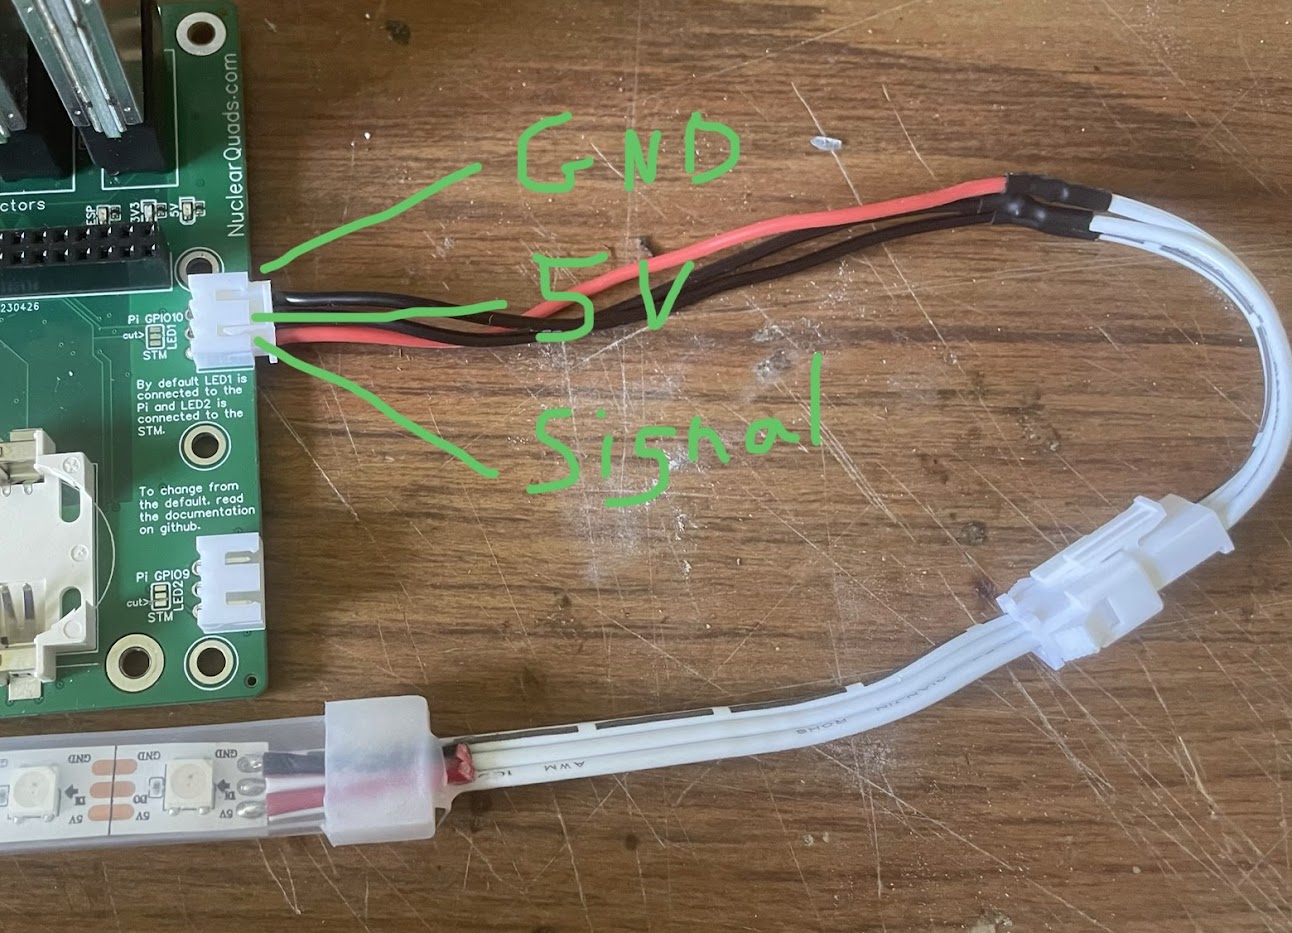
LED Strip
The pinout for the LED strip connector is like this.